LED strip lighting
COB vs SMD, 12 V vs 24 V, density, CRI, cutting, power, channels and special strips
An LED strip light is a flexible printed circuit with LEDs mounted at regular intervals, usually powered from a low-voltage constant-voltage supply and sold on reels of 5 m. It gives a long, thin line of light for coves, cabinets, shelves, vehicles and signs, and it can be cut to length at marked points.
Two strips that look the same in a listing can differ twice over in brightness, color quality, heat and lifetime. This guide is the buyer's and installer's companion to the technical pages. It explains which type to choose, how to cut, solder and mount a strip, how to light under cabinets, and what neon flex, rope light and addressable strips add. The chip numbers are on the SMD 2835 vs 5050 vs 3030 page, and the power and wire sums are in the LED strip power supply and voltage drop calculator.
COB or SMD strip: which should you buy?
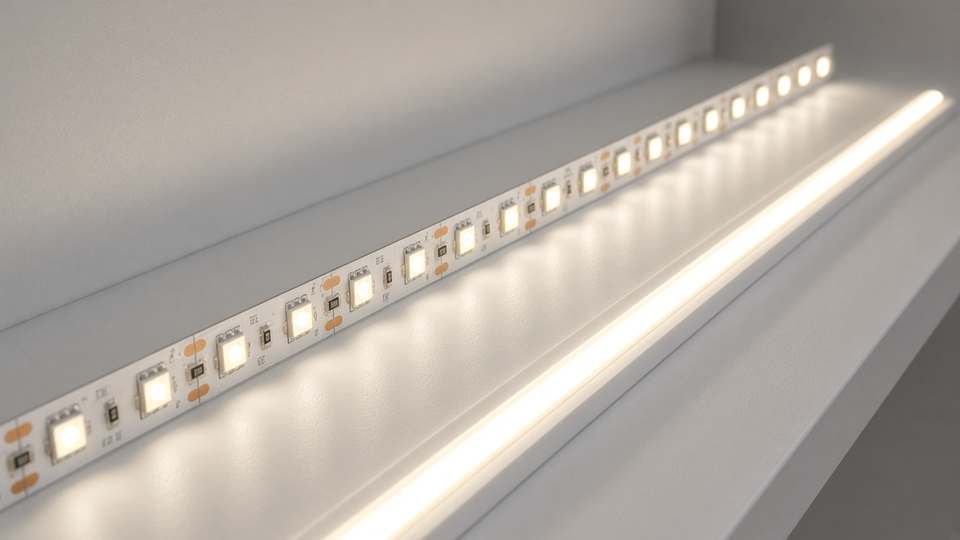
Buy SMD strips for the best price, efficacy and range of colors when the strip will be hidden or diffused. Buy COB strips when the strip is visible or reflected, because hundreds of tiny dies per metre give a continuous line of light with no dots. COB costs more, runs warmer and offers fewer color options.
| Feature | SMD strip (2835) | COB strip (dotless) |
|---|---|---|
| Look | Visible dots unless diffused | Continuous line, no dots |
| Density | 60–240 LEDs/m | 320–528 dies/m |
| Power per metre | 6–20 W | 8–15 W |
| Light per metre | 600–2,200 lm | 800–1,500 lm |
| Color choice | Wide: CCT, RGB, RGBW, tunable, high CRI | Mostly white, tunable white and RGB are growing |
| Best for | Coves, cabinets and channels with diffusers | Open or glossy installs, glass shelves, signage |
| Price | Lower | Higher |
This is the buyer's view. For how the packages are built, how heat escapes each one and why a COB behaves differently, see COB vs SMD vs CSP and the strip table in Which chip for LED strips?. If the strip sits in a deep channel with an opal cover, a high-density SMD strip hides its dots well and costs less; use COB when the lens or reflections would show every dot.
12 V or 24 V: which LED strip should you buy?
Buy 24 V for fixed installations: at the same power it draws half the current of 12 V, so it loses less voltage, runs farther from one feed and needs thinner wire. Buy 12 V for cars, boats, RVs and battery systems, and 5 V only for short addressable strips or USB-powered projects.
The voltage of the strip, the power supply, the dimmer and the controller must all match: plugging a 12 V strip into a 24 V supply will burn it out. The voltage also sets the cut length. Typical 12 V strips are cut every three LEDs, about 2.5–5 cm, and 24 V strips every six, about 5–10 cm, depending on density, so a 24 V strip cannot always be trimmed as closely. In return, a 24 V run of the same wattage has a quarter of the relative voltage loss. The maths, with a table of maximum runs for 5, 12, 24 and 48 V, is in the calculator's voltage section.
- Buy 12 V when the source is a vehicle or battery, when you need cuts every 2.5 cm, or when runs are short (under about 3 m).
- Buy 24 V for homes, shops and any run over about 3 m, particularly strips above 10 W/m.
- Avoid mixing. Buy supply, dimmer and strip from the same voltage rating, and label the supply.
How many LEDs and lumens per metre do you need?
Judge brightness by lumens per metre, not LED count or color claims. White strips usually make 300–600 lm/m for accents, 800–1,200 for cove and under-cabinet light, and 1,500 or more for task or high-output work. Higher density, 120–240 LEDs per metre, also hides dots and lets each chip run cooler.
Lumens per metre is watts per metre times efficacy, and good strips deliver roughly 90–130 lm/W (see lumens, watts and efficacy), so 10 W/m at 100 lm/W is about 1,000 lm/m. A 600 lm/m strip is plenty for accent lighting; the same strip is dim under a counter. Cheap strips that claim high wattage with a low LED count usually run each chip too hard, which means hot spots, color shift and early dimming.
| Use | Lumens per metre | Watts per metre | LEDs per metre |
|---|---|---|---|
| Accent, TV bias, backlight | 200–500 | 3–6 | 60–120 |
| Cove, shelf and toe-kick | 500–1,000 | 6–10 | 120–240 |
| Under-cabinet task light | 800–1,200 | 8–12 | 120–240 |
| Workshop, garage, task | 1,200–2,000+ | 12–20 | 240+ or COB |
To compare light levels to old bulbs, use the lumen equivalents table, and for how many lux a task needs, see recommended light levels. To size the supply for the watts you pick, use the power supply sizing notes.
What CRI and color temperature should a strip have?
Choose CRI 90+ with a high R9 for homes, kitchens and anything with skin, wood or food. CRI 80 is fine for accent and garage use. Pick 2700–3000 K for living spaces and 3000–4000 K for kitchens and workshops, and buy a whole project from one batch, because separate reels can differ in color.
The same strip chip can be sold at CRI 80 or 95 with different phosphors, and the higher grade gives up some lumens per watt. R9, the deep red score, decides whether meat, wood and skin look healthy (see R9: why deep red matters). The recommended CCT and CRI by room chart applies to strips as to any lamp, and color consistency explains why matching reels matters. Tunable-white strips mix a warm and a cool chip row to let you pick any CCT from about 2700 to 6500 K, but they need a matching two-channel controller and a 3-wire or 4-wire feed. RGB and RGBW strips are for decorative color, and their "white" is usually poor.
How do you cut and join LED strips?
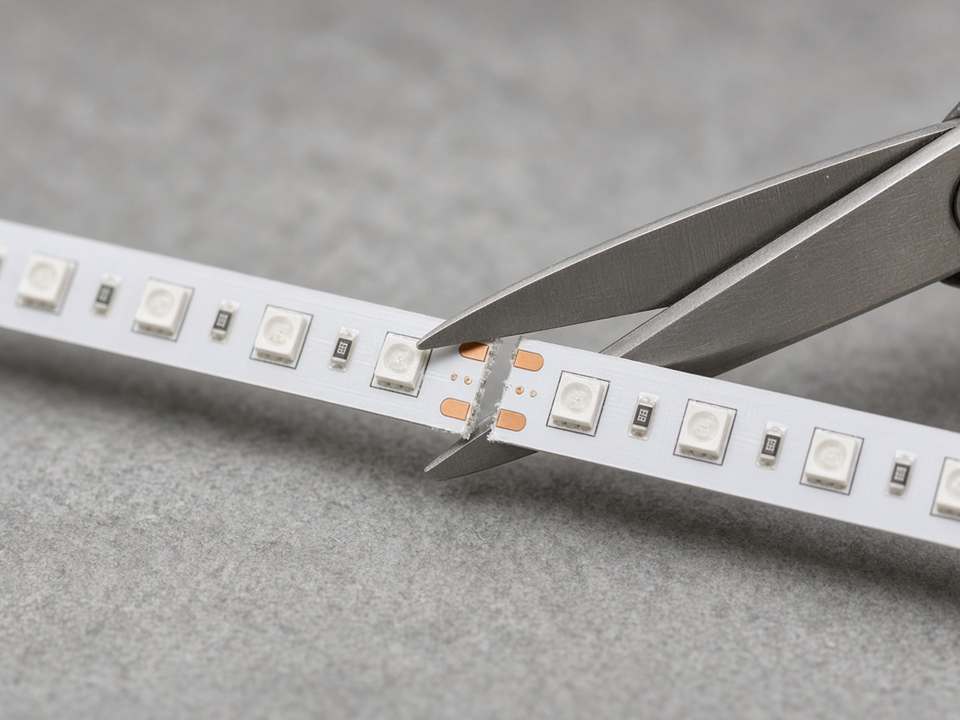
Cut only along the marked line through the copper pads, usually every three LEDs on 12 V strips and six on 24 V strips. Rejoin sections with soldered wire and heat-shrink for a permanent joint, or with solderless clips for quick indoor work. Check polarity, seal cut ends on coated strips, and avoid sharp bends at the joint.
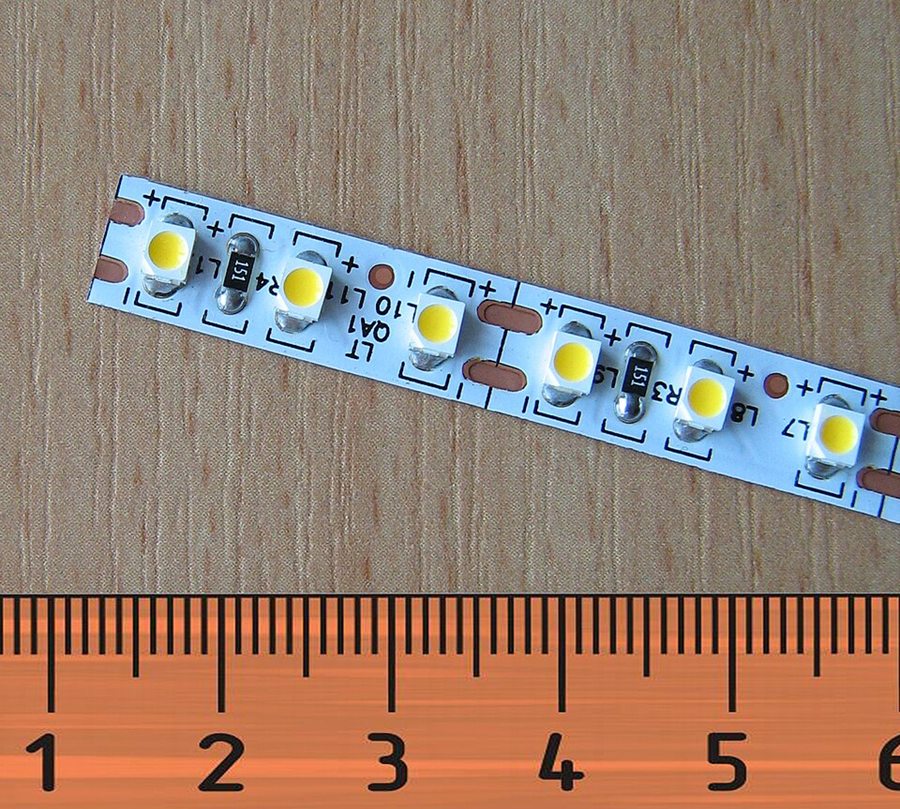

Each group of LEDs and its resistor or small current-control chip is a self-contained block. Cutting through the group's copper pad, at the scissors mark, leaves every block working. Cutting anywhere else loses the group, so the end of a strip can be dark. Measure the run, plan the cuts so that the last full group fits, and put the cut ends where the connectors will hide them. Always match the plus and minus pads and the colors of the wires, and for RGB or tunable strips match each channel.
How do you solder an LED strip?
Tin each copper pad with a little solder, tin the wire end, then touch the two together with a temperature-controlled iron for about two seconds. Use stranded wire sized for the current, add heat-shrink to the joint, and test before you stick the strip down. Too much heat lifts the pad, so work quickly.
A 25–40 W iron at about 300–350 °C works for most strips. Strip 3 mm of wire, tin it, and use a small drop of flux so the solder flows. For coated or sleeved strips, cut the silicone back about 5–10 mm with a sharp blade, solder, and reseal with silicone adhesive and an end cap. Leave a short loop of slack and tape or clip the wire so a tug cannot lift the pad. Choose wire size from the wire gauge table.
Are solderless strip connectors reliable?
Clip connectors are fine for indoor, low-current, easy-access joints. They clamp spring contacts onto the pads, so a poor fit, an uneven strip or vibration can give flicker or a dead section. For high-power, outdoor or hidden joints, solder, or use sealed waterproof connectors, and match the connector's width and number of pins to the strip.
Connectors are made for a given strip width (usually 8 or 10 mm) and pin count: 2 for single color, 3 or 4 for tunable and RGB, 4 or 5 for RGBW and 3 for most addressable strips. Press them fully shut and check each pad lines up with its contact. Heat at a poor clip contact is a common failure, so avoid them on high-current runs.
How do you avoid voltage drop on long runs?
Voltage drop dims the far end of a strip because current flows through thin copper. Stay within the maker's maximum run per feed, often one 5 m reel at 12 V, prefer 24 V, and feed long runs from both ends or every few metres. Use wire thick enough from the supply, and let the calculator check your numbers.
As an example from the calculator's worked figures, 5 m of 14.4 W/m strip fed from one end loses about 12.5% of the supply at 12 V, but only about 3% at 24 V, because the current is halved and the voltage it has to hold is doubled. At 12 V, a loss that size is why strips look dim and yellowish at the end. Fix it with a second feed at the far end or the middle (see power injection), and never join reels end to end beyond the maker's limit.
- Plan feeds early. One supply, separate wire pairs to each reel, fused in the positive wire.
- Size the supply. Use the power supply rule: total watts divided by 0.8.
- Use proper wire. The wire gauge table gives the longest run per size.
- Dim with a matching dimmer. A PWM dimmer between the supply and strip must match the voltage and the total current; see how LEDs are dimmed.
Do LED strips need aluminum channels and diffusers?
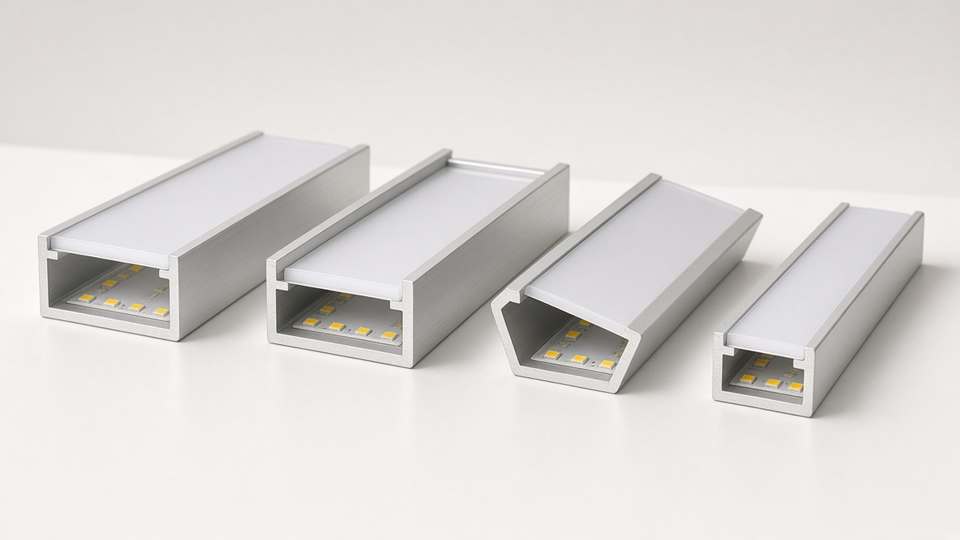
Yes, for anything left on for long hours. An aluminum channel carries heat away, keeps the strip straight and protects it, while an opal diffuser turns separate dots into a smooth line. Choose a channel that fits the strip's width, usually 8 or 10 mm, and one deep enough, about 10–15 mm, to hide the dots.
| Channel | Mount | Best for |
|---|---|---|
| Surface | Screws or tape on a flat face | Under cabinets, shelves, general use |
| Recessed (flush) | Routed groove in wood or panel | Furniture, stair edges, clean architectural lines |
| Corner (45°) | Inside corner of two surfaces | Coves, cabinets and ceilings, wall washing |
| Plaster-in or drywall | Set into plaster or drywall | Cove lighting and continuous ceiling lines |
| Bendable | Flexible aluminum or plastic | Curves and arches |
Diffusers are clear (maximum output, dots visible), frosted (some diffusion) or opal (most diffusion, about 20–40% light loss). A rule of thumb for hiding dots is to keep the diffuser two to three times the LED spacing away from the strip, so 120 LEDs per metre (about 8 mm apart) needs a deeper channel than 240 per metre. Clean the surface with isopropyl alcohol before applying the strip's adhesive, press firmly along its length, and add clips if the surface is textured, dusty, cold or damp, because the tape on cheap strips often lets go.
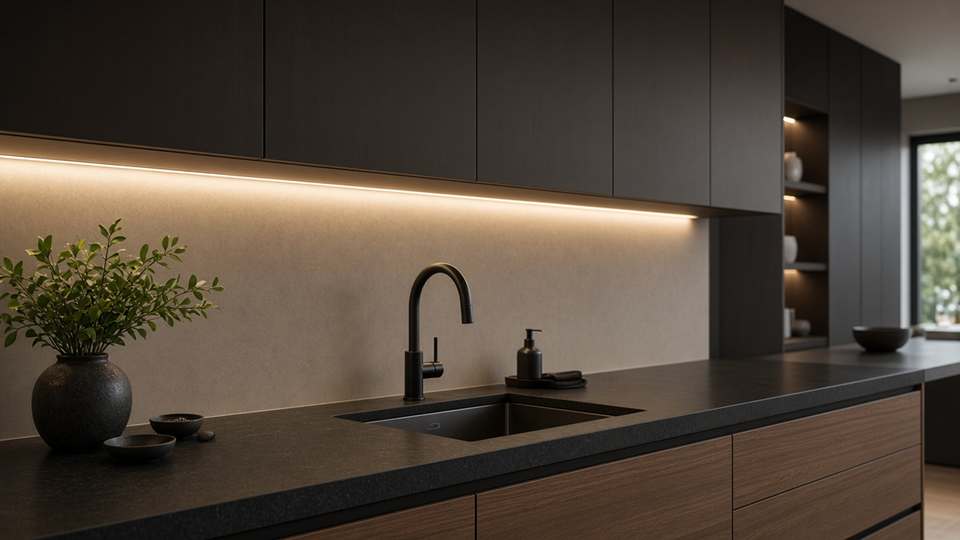
How do you light under cabinets with LED strips?
Mount the strip near the front edge of the cabinet underside, behind a lip or in a channel, so it lights the counter without glare or reflections on glossy surfaces. Use 24 V, 3000–4000 K and CRI 90+, aim for 500–1,000 lumens per metre, and put the power supply and dimmer where they stay accessible.
A rough check: a strip of 800 lm/m along the front of a 0.6 m deep counter, with about half the light reaching the surface, gives roughly 800 × 0.5 ÷ 0.6 ≈ 670 lux, inside the 300–750 lux range recommended for kitchen counters (see recommended light levels). Placing the strip at the back lights the wall, not the work area, and a bare strip at the front reflects dots in a glossy counter, so use a diffuser. Choose a plug-in Class 2 supply, which is limited to 100 W at these voltages, for easy installation; hardwired supplies and hidden junctions are best left to a licensed electrician.
- Wiring. Run the low-voltage cable in a channel or along the cabinet back, and drill a bushed hole where it passes through.
- Control. Add a door or motion switch, or a dimmer, rated for the strip's voltage and current.
- Listing. Use a UL-listed supply and strip, such as UL 8750 or UL 2108 equipment.
- Home overview. More examples are in cove, under-cabinet and strip lighting.
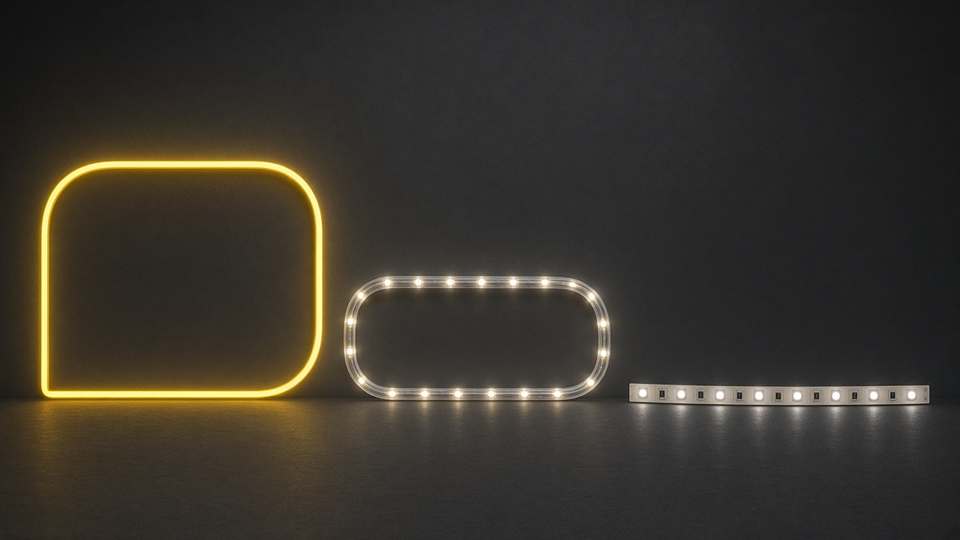
What is the difference between neon flex and rope light?
Neon flex is an LED strip inside a solid silicone or PVC extrusion that glows as one continuous line, usually 12 or 24 V and bendable in one direction. Rope light is a round tube of spaced LEDs, often 120 V with visible dots. Neon flex suits signs and architecture; rope suits simple outlining.
| Type | Construction | Voltage | Look | Best for |
|---|---|---|---|---|
| LED strip (open or coated) | Flexible circuit board, bare or coated in silicone | 5, 12, 24 or 48 V | Dots unless diffused | Coves, cabinets, channels |
| Neon flex | Strip inside a molded silicone or PVC body | 12 or 24 V | Smooth, continuous line | Signs, outlines, architecture, outdoor lines |
| Rope light | LEDs spaced in a round clear tube | 12 V or 120 V | Dotted line | Eaves, steps and simple outlines |
Neon flex bends only in its soft direction, which is either the "top bend" or the "side bend", so choose the profile for the shape you need and check the minimum bend radius. It is cut at marked points, often every 1–2.5 cm, and the outer body protects the LEDs from weather and UV in a way plain strips cannot. Rope light is thicker, cheaper and simple to run from a plug, but the connectors and the cut lengths are fixed by the maker, and UV makes cheap PVC cloud. For outdoors, look for an IP65 or higher rating and an outdoor listing (see IP ratings).
What are addressable LED strips, and how do you power them?
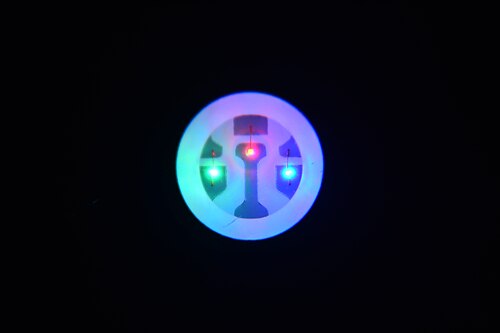
Addressable strips put a small control chip next to each LED or group, so a controller sets every pixel's color and brightness over one data wire. Common chips are the 5 V WS2812B, the 12 V WS2811 and WS2815, and clocked APA102 or SK9822. They need power injection and a shared ground.

| Chip | Voltage | Wires | Notes |
|---|---|---|---|
| WS2812B | 5 V | Power, ground and data | The common "NeoPixel" type; about 60 mA per pixel at full white |
| WS2811 / WS2815 | 12 V | Power, ground, data (WS2815 adds backup data) | Lower current, longer runs |
| SK6812 RGBW | 5 V | Power, ground and data | Adds a true white channel |
| APA102 / SK9822 | 5 V | Power, ground, data and clock | Clocked, faster refresh, tolerant of timing |
Addressable strips are driven by a microcontroller or a ready-made controller such as WLED. Add a small series resistor on the data line and a large capacitor across the supply, and use a level shifter if a 3.3 V controller drives 5 V pixels. At 5 V the current is high, so inject power every one to two metres, never inject on the data line, and join the controller ground to the strip's ground; the power injection and voltage notes explain why. The chips and their protocols are described under addressable LEDs, and RGB, RGBW and tunable options under bi-color, tri-color, RGB and RGBW.
What should you check before buying an LED strip?
Check voltage, LEDs and watts per metre, lumens per metre, CRI and R9, color temperature, IP rating, board width and cut length. Look for makers that name the LED chip and the copper weight. Match the supply and controller to the strip, and buy the full length from one batch.
- Output. Lumens per metre and watts per metre, not LED count alone. See density and brightness.
- Color. CCT, CRI and R9 data, or a TM-30 report on premium strips. See CRI and color temperature.
- Build. A board width (8 or 10 mm), 2 oz or heavier copper for long runs, and named chips from an established LED maker.
- Protection. IP20 for dry spaces, IP65 coated for damp ones, IP67 sleeve for outdoors and IP68 potted for wet. Adhesive tape does not hold in wet places.
- Power. A constant-voltage supply at the strip's voltage with a UL, ETL or CE mark. See power supply sizing.
- Accessories. Channel, diffuser, connectors, feed wire and a dimmer or controller that suit the strip's voltage and current.
Frequently asked questions
Is COB or SMD better for LED strips?
SMD costs less and offers more color options, so it suits diffused or hidden strips. COB gives a seamless line with no dots, which suits open or reflective installs, but it costs more and runs warmer.
Should I buy 12 V or 24 V LED strips?
24 V for most fixed installations and long runs, because it draws half the current and loses less voltage. 12 V for vehicles, boats and battery systems, or when you need very short cuts.
Can I cut an LED strip anywhere?
No. Cut only at the marked pads, usually every three LEDs on 12 V and six on 24 V strips. Cutting elsewhere leaves a dark section and can damage the circuit.
How do I connect LED strip lights to power?
Use a constant-voltage supply that matches the strip's voltage, sized for at least 125% of its wattage. Connect plus to plus and minus to minus, and see the calculator for supply, wire size and feed points.
Do LED strips need a heat sink?
Strips above about 5 W/m benefit from an aluminum channel, and high-power strips and COB strips need one to hold their light output and life. Low-power accent strips on non-flammable surfaces can run without it.
What CRI should an under-cabinet strip have?
CRI 90 or higher, ideally with a high R9, at 3000–4000 K. Food, wood and skin look natural, and the strip should be mounted near the front edge behind a diffuser.
What is the difference between neon flex and an LED strip?
Neon flex wraps an LED strip in a solid silicone or PVC body to give a smooth, weather-resistant line that bends in one direction. A plain strip is thinner and more flexible but shows dots unless diffused.
How long do LED strips last?
Good strips are rated for 25,000–50,000 hours, but heat and overdriving shorten that. Mounting in a channel, avoiding full-power runs and using a quality supply lengthens it; see the lifespan guide.
Sources and further reading
- UL 8750, Light Emitting Diode (LED) Equipment for Use in Lighting Products; UL 2108, Low Voltage Lighting Systems; UL 1310, Class 2 Power Units.
- NFPA 70 (National Electrical Code), Article 411, Lighting Systems Operating at 30 Volts or Less and Lighting Equipment Connected to Class 2 Power Sources.
- IEC 60529, Degrees of protection provided by enclosures (IP Code).
- CIE 13.3-1995, Method of measuring and specifying colour rendering properties of light sources; IES TM-30-20, Method for evaluating light source color rendition.
- Worldsemi, WS2812B and WS2815 datasheets; Adafruit, Adafruit NeoPixel Überguide.
- Waveform Lighting and other strip makers' technical notes on high-CRI strips, cut points and channel selection.
Image credits
- SMD strip comparison: BrentMauriello, CC BY-SA 4.0. SMD 3528 strip: Andrey Gvrv, CC BY-SA 3.0. RGB 5050 macro: Akbermamps, CC BY 4.0. All via Wikimedia Commons.
- COB vs SMD dots, cut-at-pads, aluminum channels, under-cabinet placement, and neon flex vs rope vs strip: AI-generated illustrations for LEDlights.org.